A few photos from the last week taken as I’ve been carving my eating spoons. They’ve proven very popular and I’m especially pleased to have got so many orders from other woodworkers and spoon carvers. The cherry wood is carving beautifully and it’s nice when carving spoons to the same design to see the subtle differences in grain and form which makes each one personal.
These spoons are available from my blog at a special winter price so if you’d like to order go through to this eating spoons post.


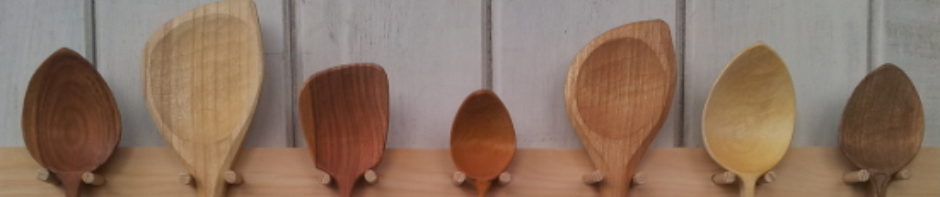
 I’m really pleased with these new eating spoons. I’ve been refining the shapes and style for a long time now and finally happy with the combination of simplicity and design in these.


 I started the day by talking about my work including how and why I make in the way I do. Carving with an axe was an eye-opener for lots of them and I explained my preference for having fewer tools which I have mastered and how this frees me to be creative with what I make. Something we shared in common was a preference for a tool finish without sanding which gives my work a much more tactile and natural finish.


 I’ve just taught the second of two Learn to Peen workshops for the Yorkshire Dales National Park. I’ve been teaching people how to mow with scythes in the park for a couple of years so it was thought that some specific peening courses would be useful to give some of those people confidence in peening which they could then pass on and spread through the networks we’re hoping to build here in the NW.


 The C-Art Open Studios event has just started with craftspeople and artists across Cumbria opening their studios to display and sell their work. Following our success last year, I am once again exhibiting as part of the


 My friend Simon Damant has become the star of a viral post currently doing the rounds on facebook.
 While we were ladder making the other week, Stanley recommended one particular wooden jack plane for me to use while smoothing the poles. I’ve used wooden planes before and enjoy the tactile process of adjusting them using a wooden mallet so this was didn’t seem anything unusual and it certainly cut sweetly.


-
Recent Posts
Categories
-
Privacy & Cookies: This site uses cookies. By continuing to use this website, you agree to their use.
To find out more, including how to control cookies, see here: Cookie Policy