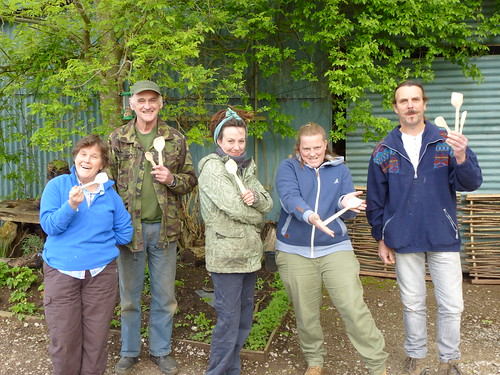
At the weekend I made a trip across the border to teach a spooncarving course at the Woodland Skills Centre for a group including Rod Waterfield, the Centre manager.
They were a great group; lots of laughs over the weekend and hard work from everyone. I had to work sometimes to convince them to adopt my carving techniques which can feel awkward initially but are ergonomic and efficient once practised and they were amazed by the sharpness of my knives but all turned out good spoons and, more importantly, went home with the skills to make more.


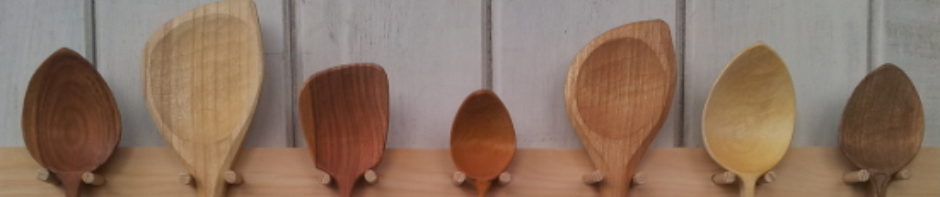
Spoons, carved with love in Wales.


 We started out by looking at samples of different grades and types of leather and discussing their qualities and uses. Ruth had brought beautiful British veg-tanned leather and explained the different ‘cuts’ and how to get the best from them by working with their natural qualities. I’ve looked through leather catalogues in the past and never really been sure what exactly the various terms mean so this was really valuable information.
 After a talk through her specialist tools and a demonstration of hand stitching we started making our own leather belts using top-quality bridle butt straps and brass buckles. A seemingly simple belt actually involves quite a number of processes to do properly including setting the buckle, finishing the edges and of course the stitching using two needles. This was the most time-consuming aspect of the belt but also the most pleasurable for me as it’s something I’ve often admired but never seen demonstrated. The method is fairly simple when you’re properly shown and a rhythm starts to develop after only a few stitches.


 There’s more to trees than just wood – the bark, sap, fruit, seeds and roots are all useful. Yesterday evening I was out collecting leaves for a project I’ve been wanting to do for a few years.
 These leaves are only a day or two old and on small, understory trees; the big mature beeches that seeded them take longer to come into leaf and, when they do, they’re to high up to easily collect. At first it can be hard to identify the ones you want because they not the characteristic waxy dark green and you can confuse young hazel for beech. To identify them, the beech has long brown cigar-shaped buds and lighter yellow-green leaves which are less serrated and more downy than the hazel. Once you see them together the difference is obvious and your eyes quickly become attuned to spotting the distinctive colour.
 Picking is quick, relaxing and quite addictive, just thinking about the texture of the leaves, choosing the ones that look nicest and listening to the sounds of the woods. Following one tree to the next soon takes you away from the paths and it’s a nice way to get gently lost even in a small wood you know well.


 Well, Peening Day is done for another year; I hope you got your blades nicely cleaned and sharpened ready for the mowing season. Peening is a vital part of using a scythe, without it you’ll find the blade not cutting as you want no matter how much you hone it.


-
Recent Posts
-
Privacy & Cookies: This site uses cookies. By continuing to use this website, you agree to their use.
To find out more, including how to control cookies, see here: Cookie Policy - June 2026
- April 2026
- March 2026
- December 2025
- October 2025
- August 2025
- July 2025
- June 2025
- May 2025
- April 2025
- March 2025
- February 2025
- November 2024
- September 2024
- August 2024
- July 2024
- June 2024
- May 2024
- April 2024
- March 2024
- January 2024
- November 2023
- August 2023
- July 2023
- June 2023
- May 2023
- April 2023
- February 2023
- January 2023
- October 2022
- September 2022
- August 2022
- July 2022
- June 2022
- May 2022
- April 2022
- March 2022
- January 2022
- November 2021
- August 2021
- July 2021
- June 2021
- May 2021
- April 2021
- March 2021
- February 2021
- January 2021
- December 2020
- November 2020
- October 2020
- September 2020
- August 2020
- June 2020
- May 2020
- March 2020
- February 2020
- December 2019
- November 2019
- September 2019
- August 2019
- July 2019
- June 2019
- May 2019
- April 2019
- March 2019
- November 2018
- September 2018
- June 2018
- May 2018
- April 2018
- March 2018
- February 2018
- January 2018
- December 2017
- October 2017
- September 2017
- August 2017
- July 2017
- June 2017
- May 2017
- April 2017
- March 2017
- February 2017
- January 2017
- December 2016
- October 2016
- September 2016
- August 2016
- July 2016
- June 2016
- May 2016
- April 2016
- March 2016
- February 2016
- October 2015
- September 2015
- August 2015
- July 2015
- June 2015
- May 2015
- April 2015
- March 2015
- February 2015
- January 2015
- December 2014
- November 2014
- October 2014
- September 2014
- August 2014
- July 2014
- June 2014
- May 2014
- April 2014
- March 2014
- February 2014
- January 2014
- December 2013
- November 2013
- October 2013
- September 2013
- August 2013
- July 2013
- June 2013
- May 2013
- April 2013
- March 2013
- February 2013
- January 2013
- December 2012
- November 2012
- October 2012
- September 2012
- August 2012
- July 2012
- June 2012
- May 2012
- April 2012
- March 2012
- February 2012
- January 2012
- December 2011
- November 2011
- October 2011
- September 2011
- August 2011
- July 2011
- June 2011
- May 2011
- April 2011
- March 2011
- February 2011
- January 2011
- December 2010
- November 2010
- October 2010
- September 2010
- August 2010
- July 2010