A use for young beech leaves

young beech leavesThere’s more to trees than just wood – the bark, sap, fruit, seeds and roots are all useful. Yesterday evening I was out collecting leaves for a project I’ve been wanting to do for a few years.
For this I want to have the freshest young leaves possible, while they’re still soft so I’ve been going to my local woods on a regular basis, watching the buds open as we head into spring. If you leave it too late in the season, the leaves will turn waxy and then you have to wait another year. I love these seasonal things that you can only do at one time of year; like picking blackberries or slipping the bark off a twig to make a whistle.
beech and hazel leavesThese leaves are only a day or two old and on small, understory trees; the big mature beeches that seeded them take longer to come into leaf and, when they do, they’re to high up to easily collect. At first it can be hard to identify the ones you want because they not the characteristic waxy dark green and you can confuse young hazel for beech. To identify them, the beech has long brown cigar-shaped buds and lighter yellow-green leaves which are less serrated and more downy than the hazel. Once you see them together the difference is obvious and your eyes quickly become attuned to spotting the distinctive colour.
young beech leavesPicking is quick, relaxing and quite addictive, just thinking about the texture of the leaves, choosing the ones that look nicest and listening to the sounds of the woods. Following one tree to the next soon takes you away from the paths and it’s a nice way to get gently lost even in a small wood you know well.
So what’s it all for? Well, I’m making beech leaf noyau – a little-known country liqueur. It’s a bit like sloe gin except using leaves instead of fruit and then adding brandy and sugar later. Here’s the recipe I’m following, from this website. I’ll keep you posted on how it’s going, meanwhile if you know any good seasonal recipes let me know in the comments.
Beech Noyau
A noyau is a cordial made from brandy, gin, cognac etc. This, however, is a classic British version, using young beech leaves.
Ingredients:
1 bottle of gin (700ml)
225g white sugar
200ml brandy
400ml young beech leaves
Method:
Only use very young beech leaves, freshly stripped from the stem. Add these to a bottle or glass jar (with a secure lid) until the vessel is half full. Add the bottle of gin then stopper the jar and store for 3 weeks before straining the alcohol off.
Meanwhile add the sugar and 300ml water to a pan and bring to a boil. Take off the heat and allow to cool before mixing with the flavoured gin and the brandy. Pour into bottles and store.
This makes an excellent mixer and can even be drunk neat. It’s well worth making and I guarantee that everyone you serve it to will go mad for it.

Posted in SteveTomlinCrafts, Uncategorized | Tagged , , , | 7 Comments

Swill basket making course

In today’s internet world it’s a treat to find a craft that’s particular to one region and still being carried out in the same way as it has been for hundreds of years. Last week I had the chance to learn some of the skills of a traditional Cumbrian craft for myself.
Owen Jones is the country’s only professional maker of swill baskets, a beautiful, rural basket made from riven oak and used for everything from carrying coal or potatoes to laundry and newborn babies. I’ve known Owen for a few years and am proud to count him among my friends as we see each other at shows and occasionally scythe events around the county. His courses are very popular and book up incredibly quickly but this year I was lucky enough to get a place on the three day course at his workshop.
We started out ‘making ready’ the oak billets, cutting logs to the right lengths and cleaving them for different parts of the basket.
oak swill basket billets cleaving oak billets
These are then loaded into a steel tank and boiled for several hours which softens the wood and allows them to be split into fine ribbons for weaving. The wood is worked straight from the boiler so we were all kitted out with towels to protect our knees, hugely fashionable. We learned to pull the wood apart, guiding the split with our hands – it’s exciting, sensuous work guided by feeling the material and I could happily done a whole week of this.
boiler loaded with oak splitting oak ribbons
At the same time we dressed a hazel rod and bent it round a former to make the swill ‘bool’ or rim.
bending the bool
Preparing the materials is a big part of the basket as some of the material must be dressed to thickness, either using a drawknife or by drawing is between your knee and a knife blade. This meant we only started weaving on the afternoon of the second day.
Every piece in the basket has a name, each is slightly differently shaped and fine-tuned by eye so although it looks like a simple weave, it actually required Owen to patiently talk us through each step as we built up the shape.
fitting the swill basket ribs
By this time I’d become too involved in the process to take photos so here are a couple of other baskets from around Owen’s home; the first are cyntells, Welsh frame baskets woven by Owen from semi-green willow and a Devon stave basket which was especially nice for me as it reminded me of my friend Mark Snellgrove who now makes these and I’ve made one myself.
cyntells Devon stave basket
And finally the finished swill basket, beautiful and strong.
oak swill basket
It took us until right up to the end of friday to complete them but Owen made sure everyone got finished and always seemed relaxed, taking time to point out a particular birdsong or tell us how excited he was to have his veg seedlings coming up in the greenhouse. It was lovely to spend the days in the company of a man so comfortable in who he is and so deeply rooted in a craft that even after 26 years and “about 10,000” baskets he still finds wonder and pleasure in the process. If you have an interest in basketry or craft in general I would heartily recommend you get along and take the course yourself.
Owen Jones, swiller oak swill baskets

Posted in greenwood courses, SteveTomlinCrafts | Tagged , , , , | Leave a comment

How's Your Peening?

scythe peening workshopWell, Peening Day is done for another year; I hope you got your blades nicely cleaned and sharpened ready for the mowing season. Peening is a vital part of using a scythe, without it you’ll find the blade not cutting as you want no matter how much you hone it.
In the UK, peening is a pretty unknown skill, we don’t hammer the edge of any other tools so there’s a lot of learning to be done. I’ve been lucky enough to learn to peen scythes from some real experts in Austria and have taught many people through the learn to peen courses I’ve run in Cumbria. Like with my other courses, I’ve been taking apart the process to find the best ways to teach people how to peen and explain the method. I’ve had lots of success with students and plan to write a few posts here to try and help those of you just getting started.
First, here’s a few starter questions to ask yourself if you’re struggling with peening:
1. Do you understand the geometry of the scythe edge, which side is beveled, what the cross-section looks like and why it’s like that?
2. Do understand how the peening jig and anvils work to form these shapes under the action of your hammering? At the scythe festival last year I did a 1-to-1 for someone who was smart enough to say that hitting a curved shape with a flat hammer didn’t make sense to him. Once I’d explained and he understood it, it was much easier to start to learn the peening process.
3. Do you do any other craft activity that involves hand-eye coordination in the same way as peening?
4. Can you peen with the jig? People often underestimate what you can achieve with this tool and how important it is as a method for progressing to the anvil.
5. Do you have a decent setup for peening and, most importantly, can you see what’s happening when you strike the blade – do you know what to look for?
6. How much time do you put into learning to peen; how many blades do you have and how often did you peen them last year?
scythe peening in the woods scythe peening in Scotland

Posted in peening & sharpening, Scytherspace | Tagged , , , , , , , | Leave a comment

Peening Day 2014

I don’t know if it’s because of the long wet winter but spring has sneaked up on me this year and it’s almost International Peening Day again!
If you went on a scythe course last year or bought a scythe you were hopefully told how important peening the blade is and given some instruction on how to do it. On my courses I demonstrate the peening jig which is the method I recommend for most people though you may also have a hammer and anvil.
Whichever method you’re using April 6th 2014 is the day to dust off your scythe, clean it up, peen and sharpen the edge so you’re ready for the coming season (or to put it to bed if you’re in the Southern Hemisphere).
As always, this is an ‘everywhere’ event in that it’s not hosted anywhere in particular so feel free to get together with a couple of scythe friends at your own place and peen blades together, that way it’s more fun and you can help each other out. If previous years are anything to go by you’ll be peening in the company of folk from around the world – feel free to send me your photos like this one of my friends Andy & Ellie from Derbyshire.
Peening Day 2013

Posted in peening & sharpening, Scytherspace | Tagged , , , , | Leave a comment

Teaching a new professional spoon carver

Another 1-to-1 spoon carving day, this time with Dan Lawrence who I’ve watched developing his skills over the last few years and is now aiming to make his living from greenwood carving. He came on my short course at Spoonfest 2013 and decided to spend some of a business start-up grant to have a whole day of individual spoon carving tuition from me.
It’s obviously quite a different teaching experience since there’s no need to go through how to use the tools and his carving was already very proficient. We’d talked in advance about objectives for the day and Dan’s principal interest was learning to carve cranks into his spoons for better ergonomics and how to make that shape flow as a whole. With a combination of example spoons, diagrams and practise we concentrated on that with deviations into other techniques and subtleties as they arose.
Dan spoon carving Dan hollowing the spoon using his twca cam
It reminded me a lot of my time in Sweden working with Fritiof Runhall when I won the QEST Scholarship last year. Learning at this level is less about simple ‘how-to’ instruction and more about working alongside someone more experienced, observing and questioning and generally trying to absorb what they’re doing in order to put it into your own work. He made copious amounts of notes, both in his book and on the spoons themselves.
spoon carving notes
We had both agreed that it was more important to focus on spoon carving techniques rather than finishing individual spoons which allowed us to get through a lot of stuff but the day seemed all too short. Fortunately Dan had time to stop over at my place so we could continue the discussions into the evening over a couple of beers.
It’s terrific to see new carvers coming on to the scene, especially when they’re as committed and skilled as Dan. He’s putting in a lot of thought and effort not only into learning the craft but also to understand the aesthetic and ergonomic challenges of carving excellent wooden spoons for people to use in their kitchen. Here’s the serving spoon that Dan carved straight after the course.
Dan's serving spoon with hook Dan's serving spoon with hook
Whether you’re brand new to carving or looking to improve, my courses will give you the skills you need; either contact me to arrange a 1-to-1 or come along to my spoon carving weekend course on 5-6 July where I can get you started safely or extend your current techniques. To book simply email me at steve-tomlin[at]hotmail.co.uk

Posted in greenwood courses, spoon carving, SteveTomlinCrafts | Tagged , , , , | Leave a comment

Spoon carving on honeymoon

At the end of last year I received this lovely request by email:
“I am really hoping that you can help me. We are coming to the Lake District in February on our honeymoon. My partner is really keen to get into carving and I would love to book him on a one to one day course with you. Are you by any chance available?”
It’s a great idea for a present and I was very happy to make space for Michael to come and spend a day with me in the workshop.
Everyone is different in their skills and abilities and an individual day makes it much easier for me to tailor the training to the student. We started with a look at tools and then some axe and knife practise. I was impressed how accurately Michael could use the axe, with confidence he’ll be taking bigger cuts which will really help his carving.
Axe practise
There’s lots of chat during these days which I enjoy, about tools or craft or the outdoors in general. It’s a great way to get to know someone and it helps make the situation relaxed and allows some time for Michael to just do his thing.
carving a spoon working with the hook knife
We made a birch cooking spoon together, based on one that I use every day in my own kitchen and added some decoration to the handle. It’s a good beginners spoon project super useful and hopefully the first of many.
handcarved spoon
The traditional gift for a 5th wedding anniversary is wood so if you’ve missed your honeymoon you could still book a course as a gift for your spouse, or come and learn together. Have a look at my carving courses page for information on the courses available

Posted in greenwood courses, spoon carving, SteveTomlinCrafts | Tagged , , , , , , | Leave a comment

Spoon carving video

I want to share this excellent video of my friend Jarrod Stone Dahl from Wisconsin carving a spoon from green wood. It’s really nicely shot and takes you through the whole process.

The video has had a lot of interest in various online groups because of Jarrod’s shaving mule which he uses to grip the spoon. I use a chairmakers shavehorse in much the same way and, as always, there’s several ways to do the same task but even if you have neither of these devices and are carving spoons simply with an axe and knives there’s plenty of other good learning which is what I want to highlight.
For me, one of the most important ideas I try to get across to people is to take the time to plan a design and draw it onto the wood. Even though Jarrod has been making this same design of spoon for 3 years now he still draws in a centerline and sketches the outline, redrawing and refining it as previous pencil marks are carved away. This isn’t just about getting a balanced, elegant shape; it enables him to carve so positively with the axe and drawknife in the early stages without having to constantly look at the shape.
Looking though is something he does a lot and the part of the video I like best. Again, this is a shape he knows intimately but he still often stops to consider the spoon as a whole and see how everything is fitting together rather than become fixated on the one section he’s carving.
Finally, look at the number of different knife grips he uses through the process. The shaving mule allows Jarrod to use different tools which is important to save his hands when he’s production carving but when he’s carving with the knife he uses a wide range of grips for different jobs. This relieves the pressure on his hands and fingers as well as being better suited to achieving carving different shapes.  On my spoon carving courses I teach five knife grips for efficient working so you can do the same. Beginners often get stuck when they first learn to carve and use just a single carving grip for the whole spoon. I like his method for carving the ‘off’ side of the handle and the ‘can-opener’ grip at 5:30 is something I’ll be trying more of myself.
Jarrod makes beautiful work including spoons, bowls and birch bark boxes while his wife April is an accomplished ash splint basket maker, check out their website to see it all http://www.woodspiritgallery.com/

Posted in spoon carving, SteveTomlinCrafts | Tagged , , , | 3 Comments

Steam bending for basketmakers

Phil Bradley steambent basket handle
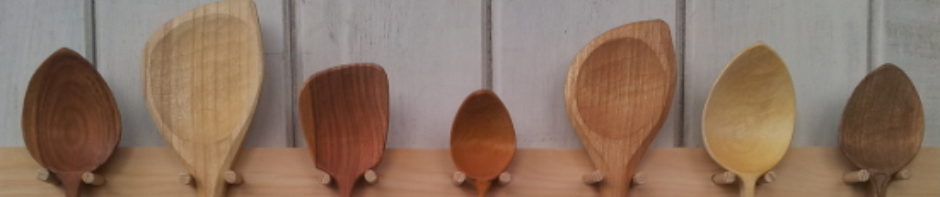
From time to time I get together with my mate Phil Bradley, who is a terrific basketmaker, for a day trying something out. Sometimes he is showing me, sometimes I show him and sometimes neither of us know what we’re doing. They are wonderful days and in my opinion, extremely important for craftspeople. All too often we are working alone and stick to what we know. There’s a kind of fear of trying new things, not just of failure but of wasting valuable time that could have been spent making familiar work. Taking time out to experiment and spent time with other makers should be a regular activity for more of us, it can stimulate all kinds of ideas, leading to new products or simply reinvigorate creativity and curiosity for a material.
This time Phil wanted to learn about steam bending wood. Susan & Ian, who are also basketmakers came along too which made four times the fun. Steambending is actually quite easy; make an insulated box, fill it with a steady supply of steam (in my case from a wallpaper stripper) and put your wood inside until it’s hot and then bend it!
steambox
The key to success is preparation; getting your materials ready, building a suitable former and having plenty of hands or clamps available as you’ve not much time while the wood is hot to get it bent into shape.
steam bending wood
Phil has been doing some chairmaking recently and has designs on a double bow windsor but for this session we were doing fairly easy bends in round hazel for basket handles. Once we’d got a system sorted they soon stacked up. You could probably produce the same by bending fresh sticks freehand but the steam will make these set much better, holding the tight corners for a more distinctive shape.
basket handles
In between work we spent the day (and evening) looking at the birch bark boxes I’ve been making recently, discussing the show season and catching up on personal news too.  Can’t wait for the next.

Posted in SteveTomlinCrafts | Tagged , , | Leave a comment

Spoonfest 2013

Way back in August last year the sleepy town of Edale was once more host to 150 spoon carving folk from around the world.
SpoonfestA new addition was the Spoon Carving Chair which was occupied by various makers and gave people the opportunity to watch the likes of Fritiof Runhall, Jarrod Stone-Dahl and others carving at their normal pace. This is very different from seeing folk carving when they’re teaching and gives a better insight into their actual methods and way of working.their actual methods and way of workin
Fritiof Runhall Keith Matthews in the spoon carving chair Barn the Spoon
Martin Hazell blessing the ovenAlso making it’s first appearance was the Spoonfest oven which was built as a course in the days running up to the weekend under the guidance of Martin Hazell, seen here giving it his blessings. The pizzas were certainly delicious.p to the weekend under the tuition of Martin Hazell whp to the weekend under the tuition of Martin Hazell who
Like 2012 I was particularly keen to help those people who have carved a few (or a lot) of spoons and were looking for a bit more advanced tuition to take their work up a level. This year, I ran a ‘Spoon Doctor’ workshop and invited the group to determine what they most wanted to learn. Running this kind of session is also a great learning experience for me as a tutor, not only to find out what folk struggle with but by keeping me on my toes. The main points of interest were positioning and carving cranks, achieving a smooth finish and carving hooks for ladles.
Spoon doctor teaching spoon carving
There was a huge amount of timber available and I tried to encourage people to think about where they start by looking at what others had discarded. There were loads pre-sawn and split spoon blanks left as ‘waste’ which were just perfect for carving into eating spoons.  It also turned up one of my favourite pieces from the whole event; does anyone know whose work this is?
wooden cutlery

Posted in spoon carving, SteveTomlinCrafts | Tagged , , , , , , , | Leave a comment

Wooden Christmas card

I don’t really do Christmas and on December 25th I shall hopefully be up on a Lakeland fell enjoying the glorious emptiness of the place but for my mum it’s an important celebration so, as much as our views may differ, we have over the years come to a mutually respectful compromise.
For my part I send a card, usually homemade. Some of my earliest memories are of cutting and sticking with her, gluing up paper and card into scenes and constructions. It was her who got me into making and though I’ve moved on to different materials I’m grateful to her for that and supporting me through it all.
This years card is a simple scrap of sycamore with incised lettering cut by hand using the tip of a carving knife, I’m sure she won’t mind sharing it with you.
Merry Christmas Mum.
Merry Christmas incised carving

Posted in SteveTomlinCrafts, Uncategorized | Tagged , , , | Leave a comment